Upgrading your mobile home’s ceiling can give your living space a fresh new look. Whether it’s due to wear and tear or a desire for something new, replacing ceiling panels is a DIY project many homeowners can tackle. This guide will show you how, focusing on the special needs of mobile home renovations.
Mobile homes have unique challenges when it comes to ceiling work. These include limited space above, weight limits, and moisture issues. Knowing these factors is key to a successful ceiling panel replacement.
There are many materials to choose from, like suspended tiles, sheetrock, and paneled options. Each has its own advantages and disadvantages, affecting both the installation and the look of your space. We’ll look at these options to help you pick the best for your mobile home.
Read more about How to Set up A Power Rack for Full Body Home Workout , Here.
Table of Contents
Key Takeaways
- Mobile home ceiling panels come in various types and sizes
- Proper preparation is essential for a successful DIY ceiling replacement
- Weight considerations are crucial when selecting new ceiling materials
- Insulation updates can be incorporated during the replacement process
- Finishing techniques greatly impact the final appearance of your new ceiling
Understanding Mobile Home Ceiling Panels
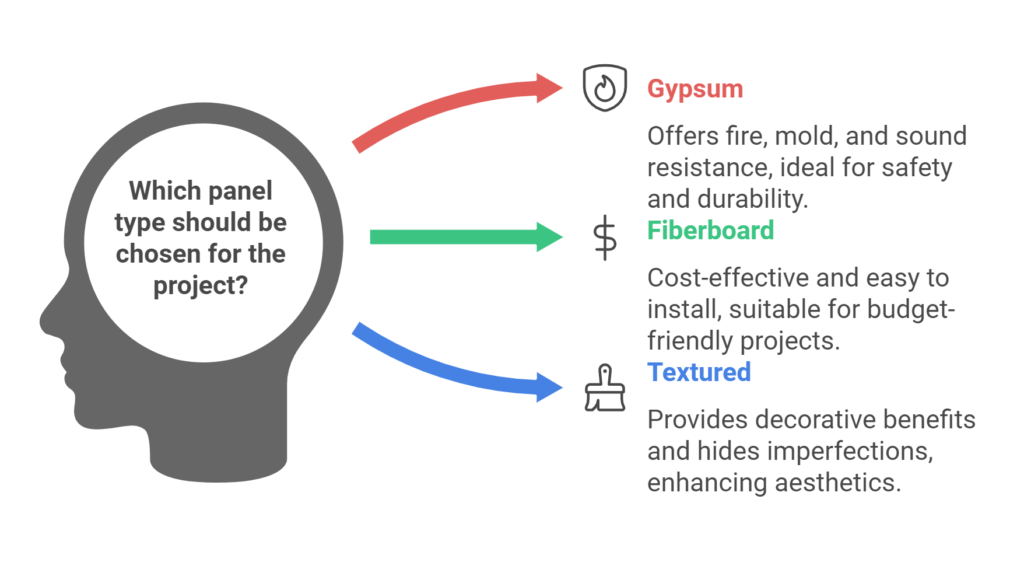
Mobile home ceiling panels are key to both the structure and look of trailer houses. They come in different types, each with special features for various needs. Gypsum boards and ceiling tiles are favorites because they’re affordable and versatile.
Types of Mobile Home Ceiling Panels
There are mainly two types of trailer house ceiling panels: fiberboard and textured gypsum wallboard. These panels are usually four feet wide and cover the home’s width. Gypsum panels are light, simple to put up, and great at absorbing sound. They also resist fire and mold, making them a smart pick for homeowners.
Common Issues with Older Mobile Home Ceiling Panels
Older mobile home ceiling panels often sag, get water damage, and grow mold. These problems are more common in homes built before the 1980s, which had flat roofs. Homes built later with pitched roofs usually have fewer ceiling issues. When fixing damaged panels, it’s key to match the texture and thickness, not the color.
Benefits of Replacing Ceiling Panels
Replacing old ceiling panels can greatly improve your mobile home. New panels make your home look better, save energy, and increase its value. You can also add extra insulation and fix moisture problems during the replacement.
The process includes measuring, cutting, removing old panels, cleaning the truss surfaces, and securing new panels. You’ll use molding, rosettes, and battens for this.
Assessing Your Mobile Home Ceiling
Checking your mobile home ceiling is key to keeping your home in good shape. This means looking for damage, moisture, and structural problems. Let’s dive into what a detailed ceiling check involves.
Signs of Damage or Wear
During your ceiling check, look for obvious signs of wear. Watch for cracks, stains, or areas that sag. These signs often mean there’s a bigger issue that needs fixing.
Soft spots in the ceiling might mean water damage or structural issues.
Moisture and Mold Inspection
Water stains on ceilings can mean roof leaks or condensation. Fix these before you repaint. Also, check for mold or mildew, especially in bathrooms and kitchens.
Structural Integrity Evaluation
Check how strong your ceiling is. Most mobile homes have ceilings made of mineral fiber or drywall. Older homes might have wiring along the ceiling, while newer ones have it in the walls.
| Ceiling Material | Common Issues | Repair Method |
|---|---|---|
| Drywall | Gouges, cracks | Fill with spackle, level, paint |
| Mineral Fiber | Water damage, sagging | Replace affected panels |
| Vinyl Paneling | Stains, peeling | Clean with TSP, repaint or replace |
Most mobile home ceilings are hard to remove. If you find big problems, get a pro for a detailed check and advice on repairs.
Preparing for Ceiling Panel Replacement
Getting ready for a mobile home ceiling renovation is crucial. Planning ahead ensures a smooth process and helps avoid unexpected issues.
First, gather essential tools and materials. You’ll need a ladder, safety gear, measuring tape, utility knife, and screwdriver. Also, protect your furniture and flooring with drop cloths.
Proper ventilation and lighting are key for a safe work environment. Open windows and use portable lamps to illuminate your workspace. Consider upgrading insulation during this project to improve energy efficiency.
- Wear protective gear (goggles, gloves, dust mask)
- Work with a partner for safety
- Measure the ceiling area accurately
- Choose appropriate replacement panels
When selecting new panels, consider factors like moisture resistance, weight, and ease of installation. PVC panels, for example, are 100% water-resistant and 40% lighter than drywall, making them ideal for mobile homes.
| Panel Type | Cost per sq ft | Features |
|---|---|---|
| Gypsum Panels | $1 – $2 | Cost-effective, smooth finish |
| PVC Panels | $2 – $4 | Moisture-resistant, lightweight |
| Wood Panels | $3 – $8 | Aesthetic appeal, varied styles |
| Metal Panels | $4 – $10 | Durable, modern look |
Remember, thorough preparation is key to a successful mobile home ceiling renovation. Take your time during the planning phase to ensure a smooth DIY ceiling project.
Removing Old Mobile Home Ceiling Panels
Removing old ceiling panels in your mobile home needs careful planning. This process, known as mobile home ceiling demolition, has several steps. These steps ensure safety and efficiency.
Safety Precautions
Before starting, safety comes first. Wear goggles, gloves, and a dust mask. Make sure to turn off electricity to avoid accidents with hidden wires. Use a sturdy ladder or scaffolding for better access.
Step-by-Step Removal Process
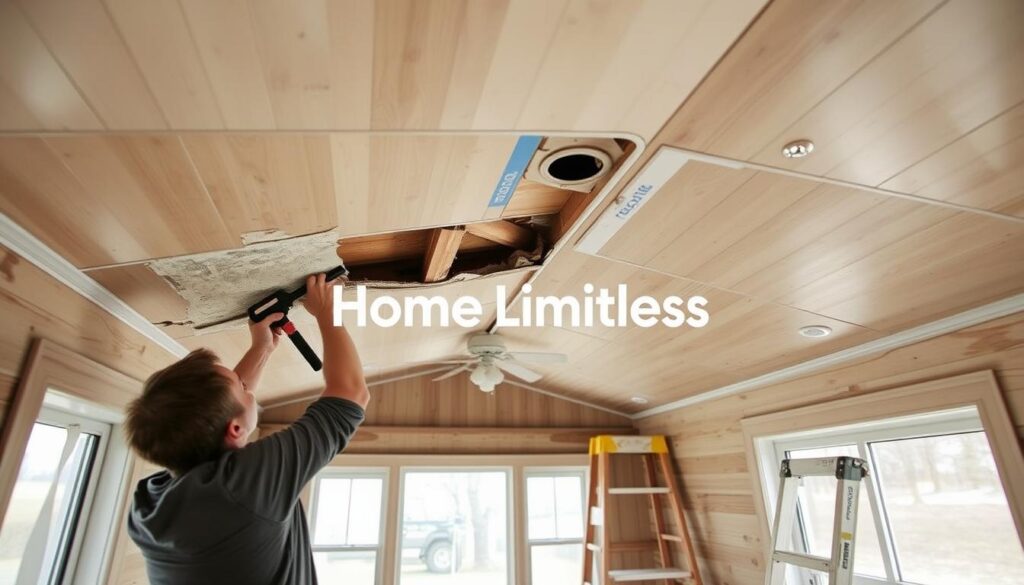
Begin by removing light fixtures, trim, and battens. Use a utility knife to cut panels around the edges. Loosen panels from trusses, working in sections. For big panels, get help to avoid damage or injury.
If you find mold, be extra careful to avoid spreading spores.
Proper Disposal of Old Panels
Dispose of old panels the right way. Check local rules for how to dispose of them. Some materials can be recycled. If panels have hazardous materials like asbestos, get professionals for safe removal and disposal.
| Panel Type | Typical Width | Disposal Method |
|---|---|---|
| Ceiling Tiles | 16 inches or 4 feet | Recycling or landfill |
| Sheetrock | 4 feet | Construction waste facility |
| Suspended Ceiling | 2’x2′ or 2’x4′ | Metal recycling for framework |
Remember, water damage often causes ceiling problems in mobile homes. Check for moisture signs during removal. Fix any problems before putting in new panels.
Choosing New Mobile Home Ceiling Panels
Choosing the right ceiling materials for your mobile home is key. You need to think about weight, moisture resistance, and cost. Let’s look at some popular options to help you decide.
Wood is a top choice for its classic look. Vinyl panels are affordable and come in many designs. Fiberglass panels are durable and fire-resistant.
Metal ceilings add a modern feel and have various finishes. Plasterboard is great for soundproofing. Plywood is affordable and strong. Foam panels are light and easy to put up.
Acoustical tiles improve sound insulation. Glass panels make rooms look bigger and brighter.
| Material | Weight | Moisture Resistance | Ease of Installation | Cost |
|---|---|---|---|---|
| Wood | Heavy | Moderate | Moderate | Moderate |
| Vinyl | Light | High | Easy | Low |
| Fiberglass | Light | High | Moderate | Moderate |
| Metal | Moderate | High | Moderate | High |
| Plasterboard | Heavy | Low | Difficult | Moderate |
Think about your home’s structure and climate when picking materials. Trusscore Wall&CeilingBoard panels are 40% lighter than drywall. They’re also 100% moisture-resistant, which helps prevent mold in humid places.
Don’t forget to add installation costs. White rosettes for attaching ceiling boards cost $12.33 for 50 or $40.72 for 250. Texture sprays like Orange Peel or Wall Knockdown cost between $28 and $37 per container.
Installation Techniques for Mobile Home Ceiling Panels
Installing new ceiling panels in your mobile home can change its look and feel. This DIY process needs careful planning and execution. Let’s explore the key steps for a successful installation.
Tools and Materials Needed
For a smooth DIY ceiling panel fitting, gather these items:
- Gypsum ceiling panels (typically 16″, 24″, or 48″ wide)
- Wide crown staples or roofing nails
- Measuring tape and pencil
- Utility knife or panel saw
- Ladder or scaffolding
- Safety goggles and gloves
- Rosettes with screws (about $4.50 for 25)
Measuring and Cutting Panels
Accurate measurements are key for mobile home ceiling installation. Ceiling panels usually come in long lengths with 2-inch strips between them. Measure your ceiling carefully, adding 15% for mistakes. Use a sharp utility knife or panel saw for precise cuts.
Securing Panels in Place
Start from one corner and work across when fitting ceiling panels. Use wide crown staples or roofing nails to secure them. For a polished look, slide plastic strips between panels to cover fasteners. Consider using decorative rosettes at panel intersections for added style.

Remember, finding exact matches for existing designs can be hard. But, alternatives like new paneling or drywall can give your mobile home ceiling a fresh look.
Insulation Considerations During Ceiling Panel Replacement
Replacing ceiling panels in your mobile home is a great chance to upgrade insulation. These changes can make your home more comfortable and cut down on energy bills.
When picking insulation, think about fiberglass batts or blown-in options. Fiberglass batts are simple to put in and save money. Blown-in insulation covers well, reaching into tight spots.
For ceilings that hang down, choose encapsulated fiberglass insulation. It’s rated Class A for low flame spread, meeting building codes. This insulation also helps with sound and keeps your home warm.
- Fiberglass batts: Easy installation, cost-effective
- Blown-in insulation: Superior coverage, fills gaps
- Encapsulated fiberglass: Fire-resistant, sound-dampening
Proper installation is key. For ½” sheetrock ceilings, add furring strips every 12 inches to avoid sagging. Use mesh tape for seams and apply three coats of lightweight joint compound for a smooth finish.
By focusing on insulation during your ceiling panel replacement, you’ll make your home more energy-efficient and cozy. These upgrades can save you a lot on heating and cooling costs over time.
Finishing Touches and Maintenance
After putting in new ceiling panels in your mobile home, it’s important to finish and maintain them well. Let’s look at the last steps and care tips for your new ceiling.
Sealing and Painting New Panels
First, seal the seams between panels. Use caulk or joint compound to fill gaps. After it dries, sand it for a smooth finish. Then, apply primer before painting for even coverage.
Choose a paint color that matches your decor and makes the room brighter.
Long-term Care for Your New Ceiling
Keeping your ceiling in good shape is key. Check your ceiling every three months for damage or wear. Clean it with a soft brush on your vacuum.
For tough stains, use a damp cloth with mild soap. But, don’t let too much water on it to avoid warping or mold.
Troubleshooting Common Post-Installation Issues
Even with careful setup, problems can still happen. Here are some DIY ceiling care tips:
- For small cracks, apply a thin layer of joint compound and sand when dry
- If you notice sagging, check for moisture problems or weak support structures
- Address any water stains immediately to prevent further damage
- In case of mold, clean the affected area with a mixture of water and vinegar
Remember, taking care of your ceiling ahead of time keeps it looking good and strong. If you’re not sure about fixing something, get help from a pro to make sure it’s done right.
Conclusion
Replacing mobile home ceiling panels is a rewarding DIY project. It can change your living space for the better. This upgrade brings many benefits, like better looks and energy savings.
Choosing the right materials is key. Gypsum board is affordable and light, while vinyl panels resist moisture well. Polystyrene panels are strong and insulate well. Stores like Mobile Home Parts Store, Home Depot, and Lowe’s have many options to fit your needs and budget.
Doing it yourself can be fulfilling, but get help if you need it. Keeping your new ceiling in good shape is important. With the right steps, updating your mobile home ceiling can be a great home improvement project.



10 thoughts on “How to Easily Replace Mobile Home Ceiling Panels in 7 Proven Steps?”