Ready to turn your home into a wellness paradise? Wondering if setting up a home infrared sauna is hard? It’s not as tough as you might think. We’re here to help you through every step.
Installing a home infrared sauna is a simple DIY task. It usually takes less than two hours with someone to help. Most kits are pre-wired and easy to assemble, needing no special tools. This guide will help you set up a sauna, whether it’s for two or three people.
We’ll cover everything from picking the right spot to the last wire connection. You’ll learn about space needs, tools, and how to assemble it step by step. By the end, you’ll be ready to enjoy your sauna’s health benefits, like detox, better circulation, and pain relief.
Table of Contents
Key Takeaways
- Home infrared sauna installation is a manageable DIY project
- Most sauna kits are designed for easy assembly without special tools
- Installation typically takes 1-2 hours with two people
- Proper location selection is crucial for optimal sauna performance
- Following manufacturer instructions ensures safe and efficient setup
- Regular maintenance extends the life of your infrared sauna
Introduction to Home Infrared Saunas
Home infrared saunas bring the power of sauna technology right to your living space. These compact wellness hubs use infrared heaters to warm your body directly. They offer a range of health benefits. Unlike traditional saunas, infrared models operate at lower temperatures, allowing for longer, more comfortable sessions.
Infrared sauna benefits extend beyond relaxation. Studies suggest regular use may lower dementia risk, ease depression, and reduce inflammation. Many users report improvements in chronic pain after repeated sauna therapy sessions.
When exploring home wellness options, consider these sauna facts:
- Sizes range from single-person units (35.5″ x 35.5″ x 75″) to four-person models (70.9″ x 47.3″ x 75″)
- Wood options include Hemlock, Cedar, and Poplar
- Types available: Far Infrared, Ultra-Low EMF Far Infrared, and Full Spectrum
- Prices for one-person saunas start at $2,199, with two-person models from $2,299
Home infrared saunas offer flexibility in setup. Some are lightweight and portable, fitting various spaces in your home. For year-round enjoyment, outdoor models provide durable designs to withstand the elements.
Investing in sauna technology for your home creates a personal oasis. With regular use, you can tap into the numerous infrared sauna benefits. This enhances your overall wellness routine without leaving your house.
Choosing the Right Location for Your Sauna
Finding the perfect spot for your home infrared sauna is key. The right place makes your relaxation better and keeps your sauna working well. Let’s look at important things to think about when picking a spot for your sauna.
Space Requirements
Infrared saunas vary in size, but most fit in small spaces. A one-person model is about 40″x44″x76″. They are designed to be space-friendly. Make sure to leave 6 inches around your sauna for air and safety.
Proximity to Power Outlets
Infrared saunas use standard outlets, making setup easy. Place it near a power outlet for a hassle-free install. This is why 60% of sauna users like indoor spots for better control.
Flooring Considerations
Choose a spot with strong, even flooring to hold your sauna’s weight. Don’t put it on carpet because of fire risks. Basements are popular, but make sure they’re dry to avoid moisture problems.
| Location | Percentage of Users | Benefits |
|---|---|---|
| Indoor | 60% | Better environmental control |
| Outdoor | 40% | Fresh air, nature connection |
| Basement | 30% | Ample space, privacy |
| Garage | 25% | Separate space, easy ventilation |
| Spare room/gym | 20% | Convenience, controlled environment |

Good air flow is crucial to avoid mold and mildew, as 70% of sauna owners say. Whether indoors or outdoors, make sure there’s enough air. This will help your sauna last longer and make it more enjoyable.
Essential Tools and Materials for Installation
Setting up your home infrared sauna needs the right tools and equipment. Make sure you have these items before starting.
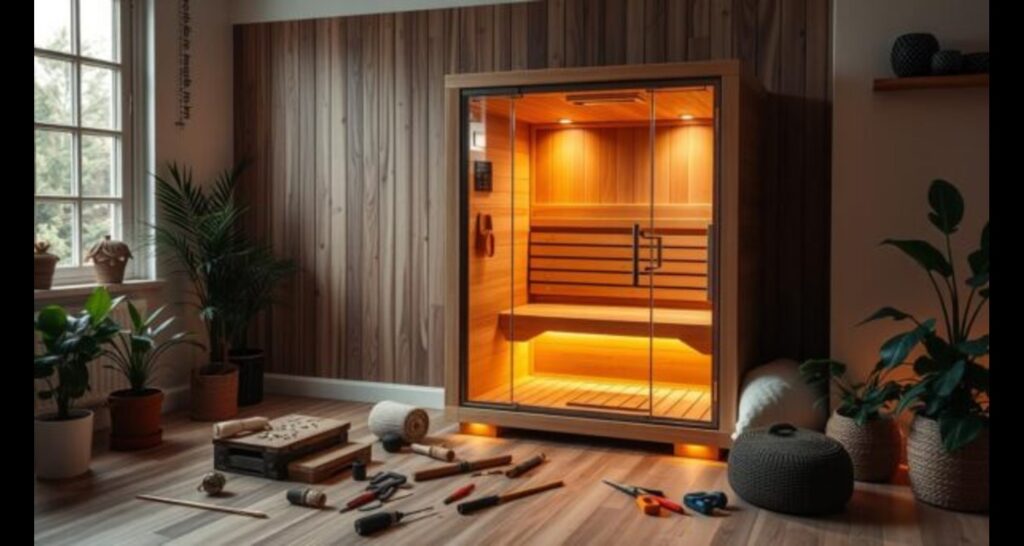
You’ll need basic tools like a screwdriver, Allen wrench, and possibly a drill. These help with putting together the sauna panels, installing the door handle, and securing glass parts.
Important materials include foam insulation, vapor barriers, and cedar boards for custom builds. Always check your sauna kit’s manual for specific needs.
| Tool/Material | Purpose |
|---|---|
| Screwdriver | Installing door handle and panels |
| Allen wrench | Assembling glass components |
| Drill/driver | Complex setups and custom builds |
| Foam insulation | Improving heat retention |
| Vapor barrier | Preventing moisture damage |
| Cedar boards | Custom interior finishing |
The tools and materials needed can vary by sauna model. Always check your manufacturer’s guide for the right items before starting.
Preparing the Installation Area
Getting your home infrared sauna ready is key. It makes sure your sauna works well and looks great. Let’s look at what you need to do to get your space ready.
Clearing the Space
First, take out all furniture and stuff from the area. Check the size to make sure it fits your sauna. A clean space makes installing your sauna easier.

Ensuring Proper Ventilation
Good air flow is important for comfort and keeping your sauna in good shape. Put in a small fan or vent. This keeps the air fresh and stops moisture from building up.
Installing Vapor Barriers
Keeping moisture out is crucial. Use a vapor barrier behind the wall panels. It keeps your home safe from moisture damage, helping your sauna and home last longer.
| Preparation Step | Purpose | Tools Required |
|---|---|---|
| Clear Space | Create room for installation | Measuring tape, moving equipment |
| Install Ventilation | Ensure air circulation | Exhaust fan, vent, screwdriver |
| Add Vapor Barrier | Prevent moisture damage | Vapor barrier material, staple gun |
By getting your area ready, you’re making your home steam sauna installation easier. Good prep means a better sauna experience that lasts longer.
Understanding Your Sauna Kit Components
Unpacking your infrared sauna kit is the first step to creating your own wellness space. Let’s explore the main parts you’ll find in your package.
Panels and Framing
Your sauna kit comes with pre-made panels for walls, floor, and ceiling. These panels are easy to assemble and come in various sizes. You’ll often find cedar, basswood, birch, and spruce woods, each with its own benefits like durability and moisture resistance.
Heating Elements
The core of your sauna is its infrared heating elements. Far infrared panels are the top choice because they penetrate deeply and offer health benefits. These panels are already installed in the wall panels, making assembly easier.
Control Panel and Wiring
Your kit also includes a control panel and wiring for simple setup. Most saunas run at 120-140°F and use standard outlets. Some models even have digital keypads and smartphone control for extra convenience.
Always check all infrared sauna parts when they arrive to make sure everything is there and in good shape. With the right assembly and care, your sauna heaters will bring you years of relaxation and health benefits.
Step-by-Step Assembly Process
Starting your DIY sauna project is thrilling. The steps to set up an infrared sauna are simple. But, it’s important to follow them closely for a good result. Let’s go through the steps one by one.
First, put the floor panel in your chosen spot. This is the base of your sauna. Then, add the back panel, followed by the side panels. Make sure they’re well connected for a solid sauna.
The bench heater panel is next. You’ll need to connect it to the power source carefully. After that, install the bench panels. They add seats and help keep the sauna stable.
The front panel, with the door, comes after. Finally, put on the roof panel. Be careful with any wiring that needs to go through.

Keep in mind, sauna parts can weigh about 300 pounds. So, having someone to help is a good idea. Most saunas take about an hour to set up. But, don’t rush. Make sure everything is right for safe and fun use.
“Proper assembly is key to a safe and effective sauna experience. Follow each step carefully, and don’t hesitate to seek help if needed.”
Installing the Base and Floor Panel
Creating a solid foundation is crucial for your home infrared sauna. The right sauna flooring ensures stability and longevity. Let’s explore the steps for a level sauna base and securing the floor panel.
Leveling the Base
Begin by cleaning the area where you’ll install the sauna. Use shims if necessary to make the surface level. This is important to avoid problems with door alignment and structure integrity later on.
Next, place the floor panel in its spot. Ensure it aligns with the assembly instructions. For custom builds, you might need to build a base frame using 2x4s before installing the floor panel.
Securing the Floor Panel
After placing the floor panel, secure it in position. Some models need to be fastened to the subfloor for stability. Use screws or bolts as directed by the manufacturer. This step keeps your sauna stable during use.
Proper installation of the base and floor is key for your sauna’s performance. Installing an indoor sauna might seem challenging, but with careful attention to these steps, you’re on your way to creating a relaxing oasis at home.
Assembling the Wall Panels
Assembling the sauna wall is key in infrared panel setup. Begin with the back panel, then tackle the sides. Most saunas use a tongue-and-groove system for easy fitting. This makes the panels fit together smoothly, building a strong sauna.
Be careful with the pre-installed wiring during assembly. It’s crucial for your sauna’s function. Handle the panels carefully to prevent damage to electrical parts. A single-person sauna usually has three IR heaters: one for the back, one for the legs, and one for the front.
When placing wall panels, make sure they’re aligned and locked in place. Some saunas have specific left and right side panels. Always follow the manufacturer’s guide to avoid errors. Use the fasteners or locking mechanisms provided to secure each panel. This care will ensure your infrared sauna is built to last and works efficiently for years.


