Ever dreamed of a personal relaxation oasis at home? DIY sauna kit make this dream real. But, is building your own sauna easy? What should you think about before starting?
Building a home sauna with a DIY kit is exciting. It brings spa luxury right to your home. Saunas started in Finland and now fit any home.
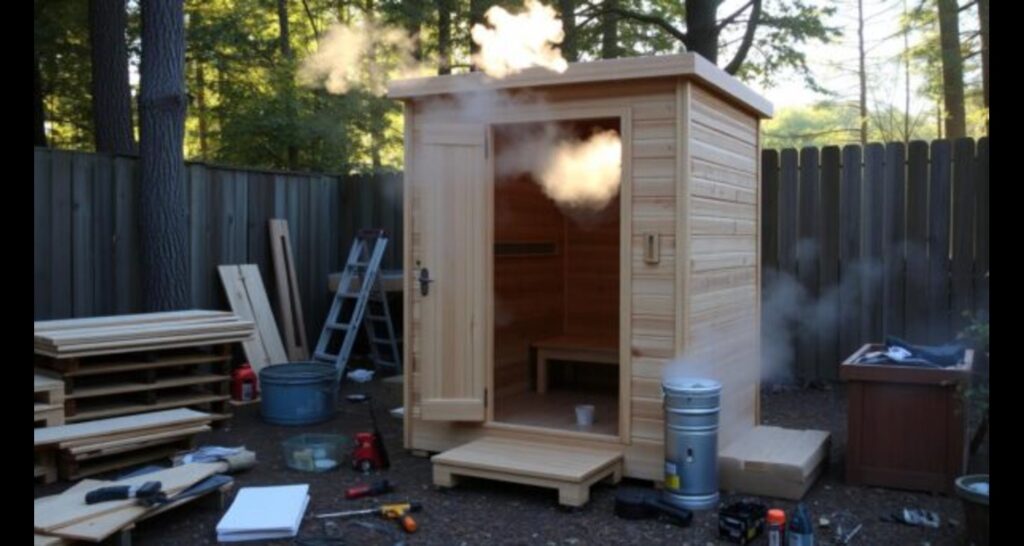
DIY sauna kit make building a sauna easy. They come with everything you need and instructions. You can choose from many styles, like barrel or infrared saunas.
Home saunas are getting more popular. The LK Plus style kit has been a top seller for decades. New designs like Premium and Floating bench kits are also popular. For those watching their budget, Knotty Cedar and Hemlock kits are good choices.
Building a sauna can be affordable. A DIY basement sauna might cost just $3,500 if you’re handy. Indoor kits start around $4,000, but custom options can be cheaper.
Table of Contents
Key Takeaways
- DIY sauna kits make home sauna construction accessible and affordable
- Various styles and materials are available to suit different preferences and budgets
- Western Red Cedar is the most popular choice for sauna building
- Proper insulation and ventilation are crucial for optimal sauna performance
- Building a sauna can be a one-day project with proper planning
- Costs can range from $3,500 to $4,000+ depending on the kit and installation method
Understanding the Different Types of Saunas
Saunas come in many forms, each with its own benefits. Let’s look at the main types to help you pick the right one for your home.
Dry Saunas
Dry saunas offer a traditional heat experience. They use wood-burning or electric stoves to heat rocks, reaching up to 195°F. Cedar is a favorite for its strength and nice smell. These saunas help relax, improve blood flow, and detoxify.
Steam Rooms
Steam saunas, or steam rooms, provide a wet heat. They run cooler than dry saunas but are very humid. This makes them perfect for opening pores, easing muscle tension, and helping breathing. You’ll often find them in spas and gyms.
Infrared Saunas
Infrared saunas heat the body with light. They work at lower temperatures (80-130°F) than traditional saunas. This makes them easier for some to handle. They’re known for their health benefits, like pain relief and boosting collagen. They come in many designs and materials to match your style.
| Sauna Type | Temperature Range | Humidity | Heat Source |
|---|---|---|---|
| Dry Sauna | 160-195°F | Low | Wood-burning or Electric Stove |
| Steam Room | 100-120°F | Nearly 100% | Steam Generator |
| Infrared Sauna | 80-130°F | Low | Infrared Heaters |
When picking a sauna, think about how you handle heat, what benefits you want, and how much upkeep you’re willing to do. Saunas for the home cost between $2,000 and $12,000, based on type, quality, and features.
Choosing the Perfect Location for Your Home Sauna
Finding the right spot for your sauna is crucial. Indoor saunas are handy and easy to get to. Outdoor saunas connect you with nature. Let’s look at some top spots and their benefits.
Basements are perfect for indoor saunas. They’re private and don’t use up living space. Garages are also good, offering a practical spot away from the house. For a luxurious feel, consider turning an attic into a sauna.
Bathrooms are smart for sauna installation. They’re already ready for moisture and have plumbing close by. Second-floor rooms or large closets can fit compact indoor saunas, adding flexibility to your home.
- Basement: Private and space-efficient
- Garage: Practical and separate from living areas
- Attic: Unique and secluded
- Bathroom: Convenient with existing plumbing
- Second floor/Closet: Flexible for smaller spaces
Outdoor saunas are great for backyards or decks. They offer a spa-like experience and let you enjoy the stars. Just remember, they need protection from bad weather.
When picking your sauna spot, think about ventilation, space, and power access. Most saunas need 240-volt electrical service. Good airflow is key to avoid moisture buildup and mold.
Pre-built indoor saunas are a favorite, costing about $4,500 on average. They’re quick to install, often taking just a few hours with two people. Models like the Almost Heaven Madison or Golden Designs Lugano fit 2-3 people well.
“Your perfect sauna location balances convenience, space, and your home’s layout. It’s about creating your personal wellness retreat.”
Essential Considerations Before Starting Your DIY Sauna Project
Building a home sauna is an exciting project, but it needs careful planning. Before starting, there are key factors to consider. These will make sure your DIY sauna project is safe, legal, and efficient.
Building Codes and Regulations
Sauna construction must follow local building codes. Check with your city’s planning department to understand the rules. Some areas may need permits for electrical work or structural changes. It’s important to follow these rules to avoid fines or safety issues later.
Electrical Requirements
Most home saunas need a 220V power supply. This is different from standard household outlets, which are 110V. For safety and efficiency, it’s best to hire a licensed electrician for the wiring. They can ensure your sauna meets electrical codes and operates safely.
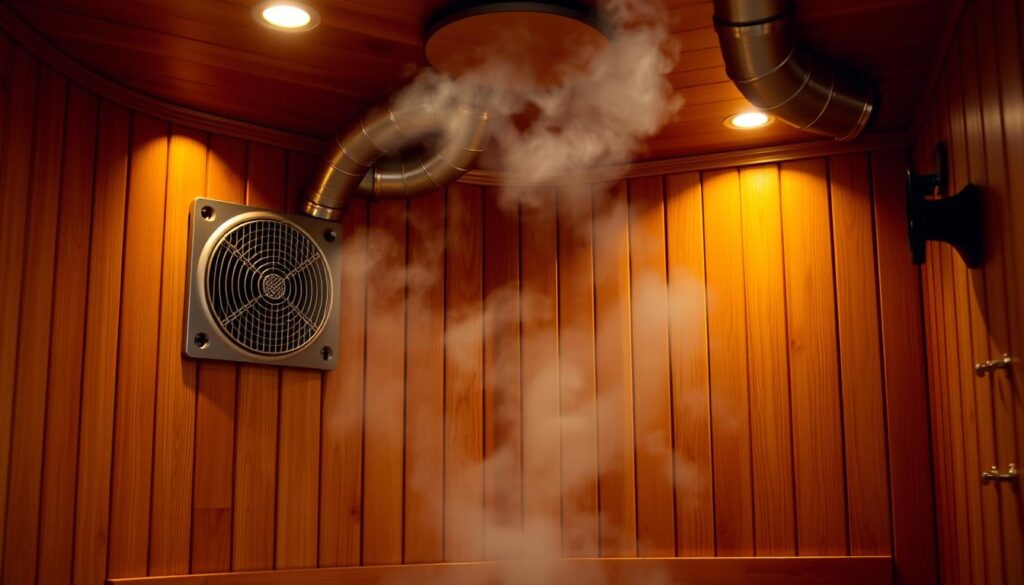
Ventilation Needs
Proper sauna ventilation is key for comfort and safety. Install vents near the floor for fresh air intake and near the ceiling for exhaust. This creates a flow that helps maintain the right temperature and humidity. Good ventilation also prevents moisture buildup, which can damage your sauna over time.
Remember, a well-planned sauna project leads to a better end result. By addressing building codes, electrical needs, and ventilation from the start, you’ll create a safe and enjoyable home sauna experience.
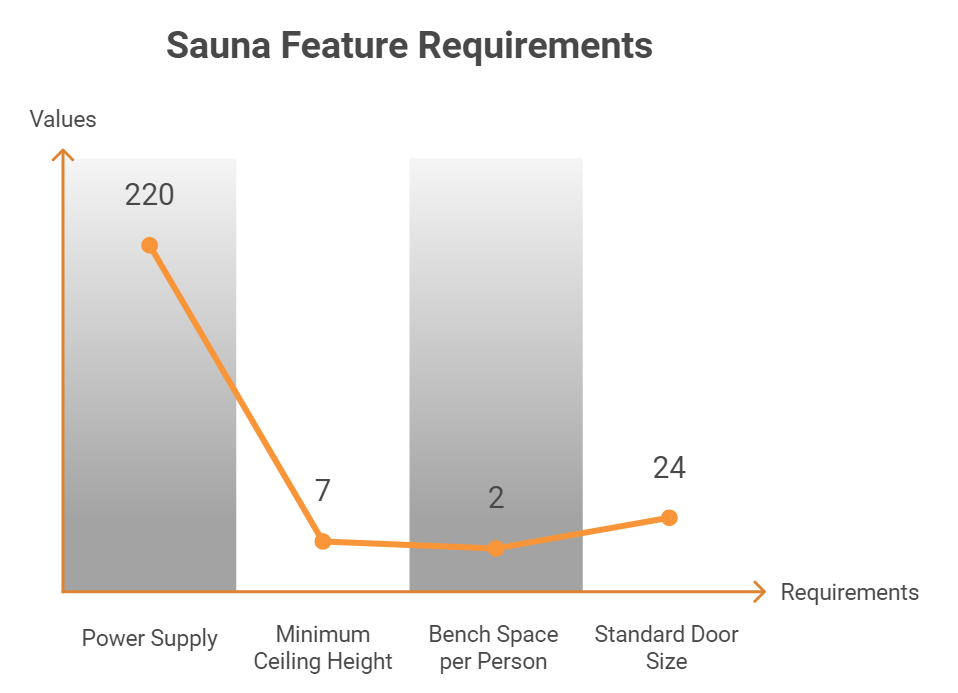
Selecting the Right DIY Sauna Kit
Choosing the right DIY sauna kit is important. You need to think about indoor vs. outdoor, size, and material quality. Each factor is key to a great home sauna experience.
Indoor vs. Outdoor Kits
DIY sauna kits are available for both indoor and outdoor use. Indoor kits fit into existing spaces. Outdoor kits have weatherproofing features.
Prefab saunas for outdoors, like barrel saunas, can hold up to four people. They come in different sizes and materials.
Size and Capacity
The size of your sauna is crucial. Saunas can be as small as 4×6 feet for 2-3 people or as large as 10×12 feet. Make sure to have 2 feet of space per person.
Barrel saunas vary in length and diameter. They can be 1500 mm to 1800 mm long and 1800 mm to 2000 mm in diameter.
| Sauna Type | Capacity | Price Range |
|---|---|---|
| Barrel Sauna | 2-4 people | $5,000 – $8,000 |
| Square Barrel Sauna | 4-10 people | $7,300 – $12,100 |
| Outdoor Spruce Log Sauna CUBE | 4-10 people | $9,400 |
Material Quality
The materials in DIY sauna kits are very important. Cedar wood is durable but expensive. White Spruce or beetle kill pine are cheaper alternatives.
Make sure the kit uses high-quality materials. These should handle high temperatures and humidity well.
“Choosing the right DIY sauna kit is about balancing your needs, space, and budget. With options ranging from $1,000 to over $10,000, there’s a perfect fit for every sauna enthusiast.”
Preparing the Space for Your Sauna Installation
Getting your space ready for a sauna installation is crucial. Whether it’s indoors or outdoors, you need a level surface and good waterproofing.
For indoor saunas, start by removing old fixtures and exposing wall studs. This makes insulation better and installation easier. Outdoor saunas need a flat, solid foundation to handle the weather.
Waterproofing is key to avoid moisture damage. For basement saunas, consider these options:
- Concrete slab with a waterproof membrane
- Epoxy paint for moisture resistance
- Cedar or duckboard flooring for natural water resistance
Good drainage is also important. If your space doesn’t have a drainage system, install one first. This keeps water away from your sauna and prevents damage.
| Sauna Location | Foundation Type | Waterproofing Method |
|---|---|---|
| Indoor (Basement) | Concrete slab | Waterproof membrane |
| Indoor (Main floor) | Existing flooring | Moisture-resistant underlayment |
| Outdoor | Concrete pad | Weather-resistant sealant |
By focusing on these key aspects, you’ll set up a strong base for your DIY sauna. This ensures it lasts long and works well.
Step-by-Step Guide to Building Your Sauna with a DIY Kit
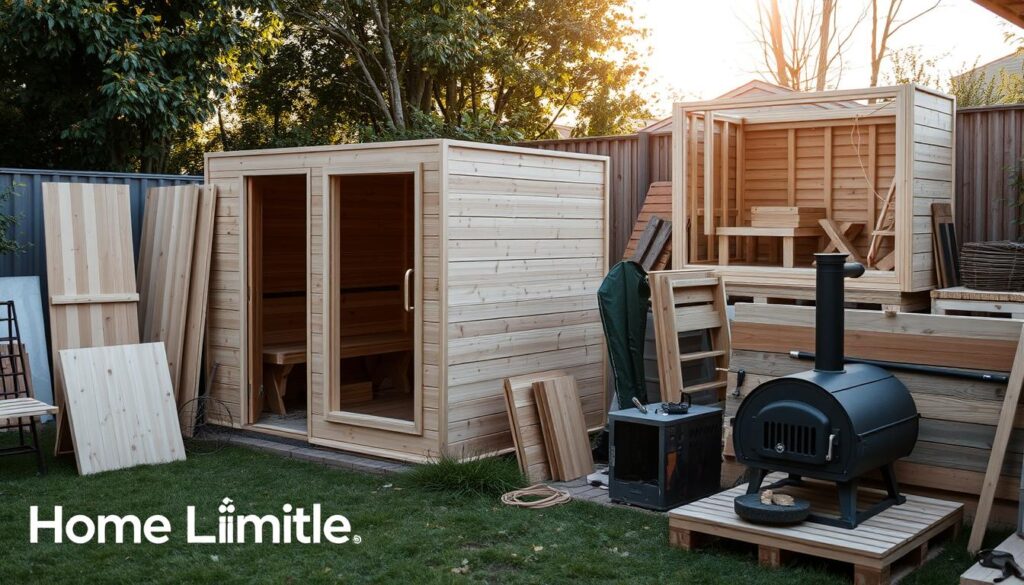
Building a sauna yourself can be a fun and rewarding project. It can even add value to your home. With the right kit and a bit of effort, you can create a cozy retreat in your backyard. Let’s explore the main steps to building your sauna.
Framing the Structure
Begin by framing your sauna as the kit instructions suggest. This is the foundation of your project. Use pre-cut materials to make things easier and avoid mistakes. A solid frame is key for a durable sauna.
Installing Insulation and Vapor Barrier
Insulation is crucial for keeping your sauna warm and energy-efficient. Use fiberglass batt insulation in wall studs and ceiling joists. Then, apply a foil-faced vapor barrier over it, making sure to seal seams with foil tape. This helps keep the heat in and prevents moisture damage.
Applying Interior Paneling
Next, add interior paneling, starting with the ceiling and moving down the walls. Choose tongue and groove pine or cedar for a traditional sauna look. Make sure to leave small gaps for wood to expand. This step turns your structure into a cozy sauna.
Setting Up the Heater and Electrical Components
Lastly, install the heater and electrical parts. Always follow the manufacturer’s instructions for safety and proper installation. This completes your DIY sauna project.
| Component | Material | Specifications |
|---|---|---|
| Ceiling Insulation | Fiberglass | 39 feet, R-19 value |
| Vapor Barrier | Plastic Sheeting | 4mil thickness |
| Ceiling Panels | Pine | 8″ wide, tongue and groove |
| Wall Panels | Western Red Cedar | 6″ wide house siding |
| Bench Material | Cedar | 5/4 deck planking |
By following these steps, you can finish your sauna in 25 to 50 hours, depending on your skill. The project can cost between $1,000 and $12,000. This offers a great mix of luxury and affordability for your home wellness space.
Choosing the Best Wood for Your Sauna
Choosing the right wood for your sauna is key for a lasting and cozy experience. The type of wood you pick greatly affects your sauna’s quality and how long it lasts.
Cedar: The Popular Choice
Western Red Cedar is a favorite for saunas. It’s soft, doesn’t crack easily, and handles heat well. Cedar saunas smell nice and fight off decay and bugs. Canadian red cedar is the priciest but offers top quality and looks.
Alternatives: Hemlock, Basswood, and Poplar
Hemlock is cheaper than cedar but still good. It’s strong, stable, and has a cool pattern. Basswood and poplar are good for those who don’t like strong smells.
Other good choices include:
- Nordic Spruce: Dense, keeps bugs away, and is light
- Alaskan Yellow Cedar: Fights fungus and has a gentle scent
- Eucalyptus: Smells nice and is eco-friendly
Think about durability, smell, cost, and what you like when picking wood. Each wood has its own perks, so you can find the best one for your sauna.
Sauna Heater Options: Electric, Gas, and Wood-Burning
Choosing the right sauna heater is crucial for a great sauna experience. You have three main options: electric, gas, and wood-burning heaters. Each has its own benefits, so let’s explore them.
Electric saunas are the most popular. They heat up quickly, are easy to control, and save energy. For small spaces, the HUUM Hive Mini Electric Sauna Heater is perfect. It comes in 6 KW, 9 KW, and 10.5 KW sizes.
If you need more power, the HUUM Hive Electric Sauna Heater has 12 KW, 15 KW, and 18 KW options.
Wood-burning saunas offer a classic feel. They fill the air with the scent of burning wood, creating a cozy atmosphere. However, they require more effort to run and maintain.
Gas sauna heaters are less common but heat up fast and can be cost-effective. They’re ideal for areas with limited electricity. The Harvia Virta Series offers both electric and gas models in 6 KW, 8 KW, and 9 KW sizes.
| Heater Type | Pros | Cons |
|---|---|---|
| Electric | Easy to use, efficient | Needs electrical setup |
| Wood-burning | Traditional experience | More maintenance |
| Gas | Quick heating | Requires ventilation |
When choosing your sauna heater, consider how fast it heats up, its ease of use, and energy efficiency. For every 45-50 cubic feet of sauna space, you’ll need about 1 kW of heater power. Always follow safety rules and get help from a pro when installing your heater.
Essential Accessories for Your DIY Sauna
Adding the right accessories to your DIY sauna makes it better. Let’s look at the must-have sauna equipment for the perfect relaxation spot.
Thermometers and Hygrometers
It’s important to check the temperature and humidity in your sauna. A cedar thermometer and hygrometer combo, part of the Cedar Sauna Accessory Kit, costs $398.40. It helps you know your sauna’s conditions.
Sauna Buckets and Ladles
Sauna buckets and ladles are key for steam. The Cedar Sauna Bucket with Liner and Lid, priced at $113.35, is made of authentic red cedar. It has a sanitary liner to stop leaks.
Proper Lighting and Ventilation Fixtures
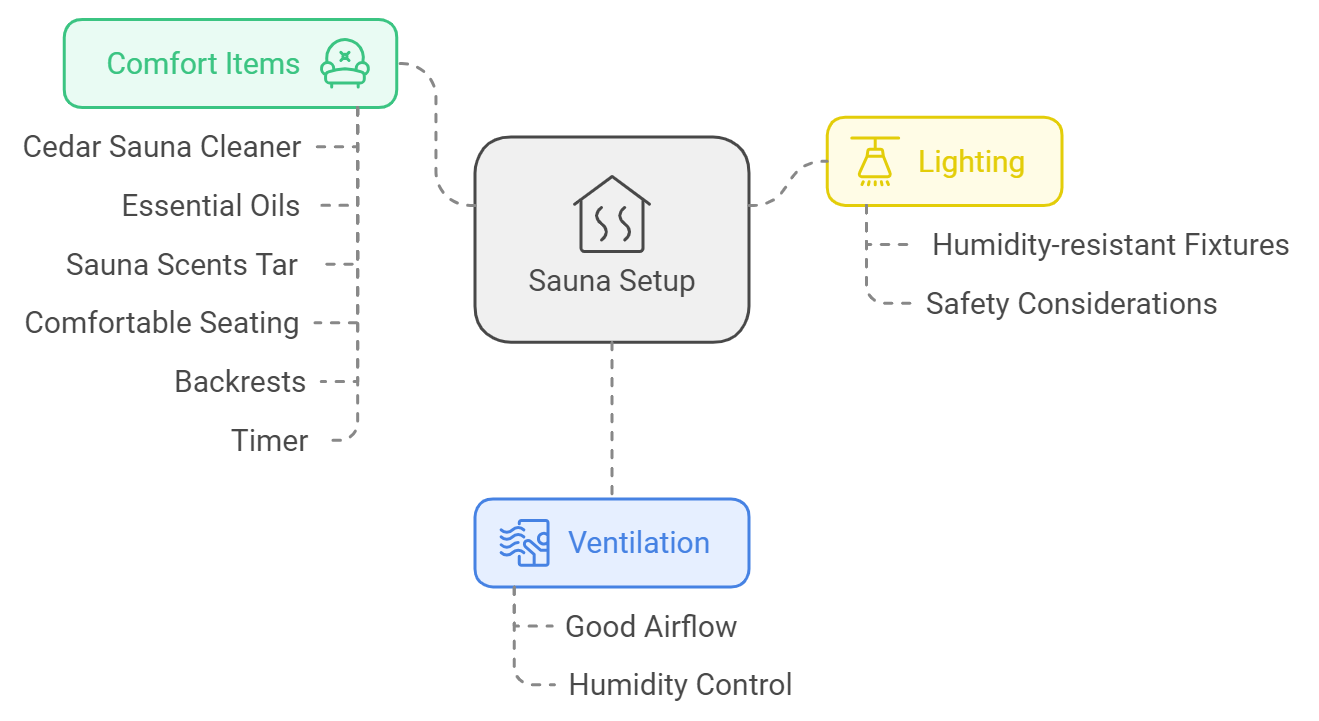
With 44 sauna accessories to choose from, you can make your sauna just how you like it. From basic needs to fancy extras, these accessories turn your DIY sauna into a spa.
| Accessory Kit | Price | Key Items |
|---|---|---|
| Cedar Sauna Accessory Kit | $398.40 | Cedar bucket, sealant, timer, backrest, thermometer/hygrometer |
| Pine Sauna Accessory Kit | $293.38 | Pine bucket, aspen ladle, sealant, timer, thermometer/hygrometer |
Maintenance Tips for Your Newly Built Home Sauna
Keeping your home sauna in top shape is key to enjoying it for years to come. Regular sauna maintenance ensures a clean, safe, and inviting space for relaxation. Here are some essential tips for sauna care to help you maintain your new oasis.
After each use, take a minute to brush water over the benches and walls. This quick step goes a long way in preserving your sauna’s cleanliness. For added hygiene, use towels on the benches to minimize dirt and sweat buildup. Once a month, give your sauna a thorough cleaning with water and mild soap to combat any accumulated grime.
Proper sauna cleaning involves more than just wiping surfaces. Here’s a handy checklist for comprehensive sauna care:
- Use distilled or soft water to prevent limescale buildup
- Preheat your sauna for 45-60 minutes before use
- Wash sauna stones regularly to maintain humidity
- Keep the sauna well-ventilated between sessions
- Apply naturally formulated oil or wax to preserve wood surfaces
Annual maintenance is crucial for your sauna’s longevity. Inspect wood surfaces, electrical components, and the exterior for any signs of wear or damage. For wood-fired saunas, check the heater efficiency yearly. By following these sauna maintenance tips, you’ll ensure a clean, safe, and enjoyable experience for years to come.
Conclusion
Building a home sauna with a DIY kit has many DIY sauna benefits. It saves money and lets you customize it. Finnish design, followed by about 90% of European saunas, can make your sauna better.
Home saunas do more than just relax you. They can improve your heart and mental health. Sauna sessions boost blood flow and release endorphins, helping your overall health. It’s important to have good ventilation and keep the heat right.
Choosing to build an indoor or outdoor sauna can be a smart move. Costs range from $3,000 to $20,000, saving up to 40% compared to pre-made saunas. Pick the right materials, heater, and accessories to make a sauna that fits your style and budget. With care, your DIY sauna will last for years, adding value to your home.





2 thoughts on “How to Build a Home Sauna with a DIY Sauna Kits”